
This article highlights the whole integration from beginning to end and will help you better your integration.
Before you begin.
-
You will need a ABACUS logins (https://app.abacus.co/OnlineOrdering/Menu )
-
For best results with the integration we recommend also having the following add-ons, they are not required for the integration to work but will lead to a better customer experience.
-
Product Variants (https://app.abacus.co/Product/ProductVarSelection )
-
Online Products - this allows you to set which products/categories you want to display online.
-
-
-
You will also need an Order Up! active account. (https://www.orderup.com.au/contact-us/) Please contact sales to organise your own system.
Activating ABACUS from Order Up
-
After logging into the console, from the Dashboard go to Integrations > POS Integrations
-
Select the edit icon for ABACUS
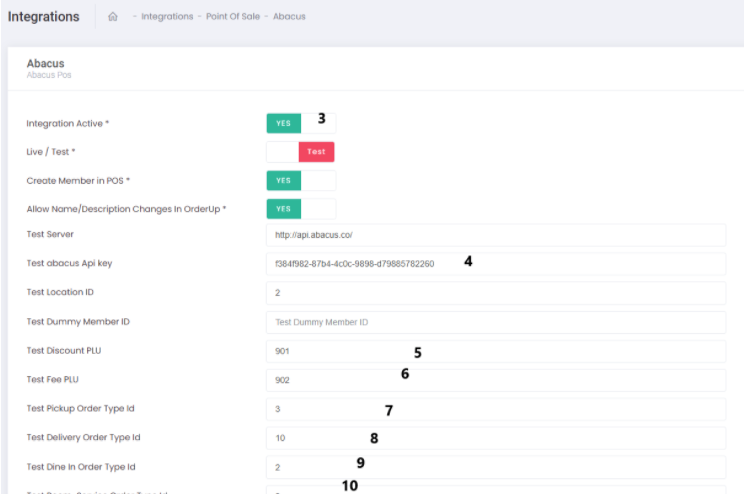

3. Make sure you turn ON the Integration.
4. Api Key will be provided by the store, each store has got a separate API KEY.
5. Discount PLU, this need to be created as an Online product (Name as Discount) with 0 price and assigned to a category called as Fees and Discounts, in the ABACUS dashboard, Please copy the Product Code, and add it here, We will be using this product code to send any discounts to the POS. Make sure the item is set Online.
6. Fee PLU, same as above, this will be created at ABACUS dashboard under category Fee, Name can be Fee, with price 0, Please copy the Product Code, and add it here, We will be using this product code to send any Fees to the POS. Make sure the item is set Online.
7,8,9,10 These are the order types as defined by ABACUS, they need to be configured accordingly.


Importing Store Data (Here we need to create the store first from Order Up console, before we do any operation)
At the Bottom the same, you will find import store data.


Clicking on it iwll import the store data with respect to the API key, we do not get all the details in our orderup platform, apart from the details mentioned above, if they are added in the ABACUS Dashboard. (This is not a mandatory step, unless we are confident that, POS has got all the store information setup) Instead you can add the store data manually.
Verifying Store/Location Data
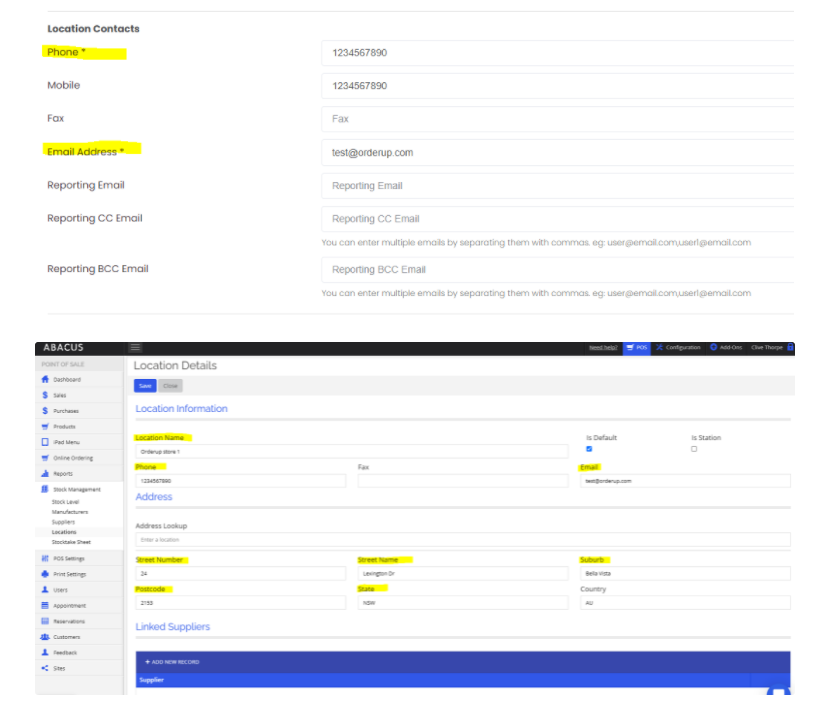
If you are not already familiar with the ABACUS integration it is worth confirming the data you see in the Order Up admin matches what is in the ABACUS admin area.
-
Log in to the ABACUS Back Office and go to My Site then select the tab Site Information
-
During an import Order Up will bring in the following fields from ABACUS:
|
Order Up Field Name |
ABACUS Field Name |
|---|---|
|
Location Name, Business Name |
Location Name |
|
Phone |
Phone |
|
Email Address |
|
|
Unit |
Street Number |
|
Street |
Street Name |
|
Suburb |
Suburb |
|
SuburbState |
State |
|
Postcode |
Postcode |
|
State |
State |

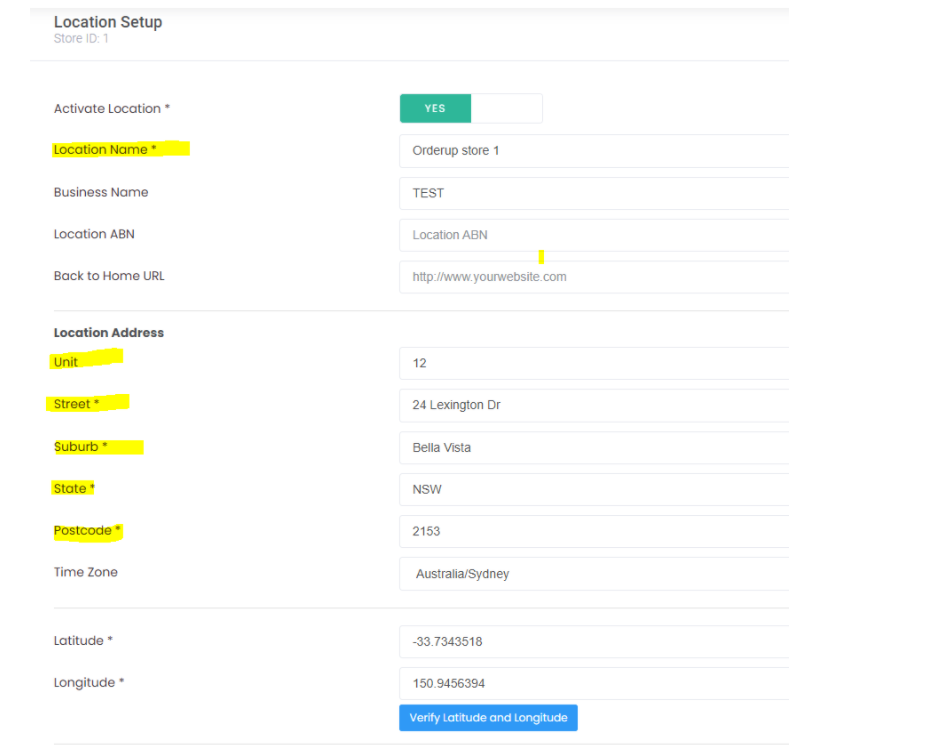
After import you can change the values stored in Order Up if you want, however if you re-import the store from the ABACUS integration it will overwrite these changes.
Verifying Online Hours
We do not import any opening hours from ABACUS Dashboard/POS, It needs to configured at Order Up end just like we do for non integrated system.
Completing Store Setup
Before you can have this store active you will need to complete the following sections:
-
Set the methods active and complete any extra settings in the Order Up! console. This may include but is not limited to fees, prep times, delivery areas, table numbers or minimum order values
-
Pick Up
-
Delivery
-
Dine In
-
Room Service
-
-
Set any payment methods as active for the relevant methods, you will need to ensure for any credit card method that you have already made this active and added your credentials to this section.
-
Activate the store via the Location Setup > Location Settings in the Order Up console.
Importing a Menu for a Specific Location/Store
-
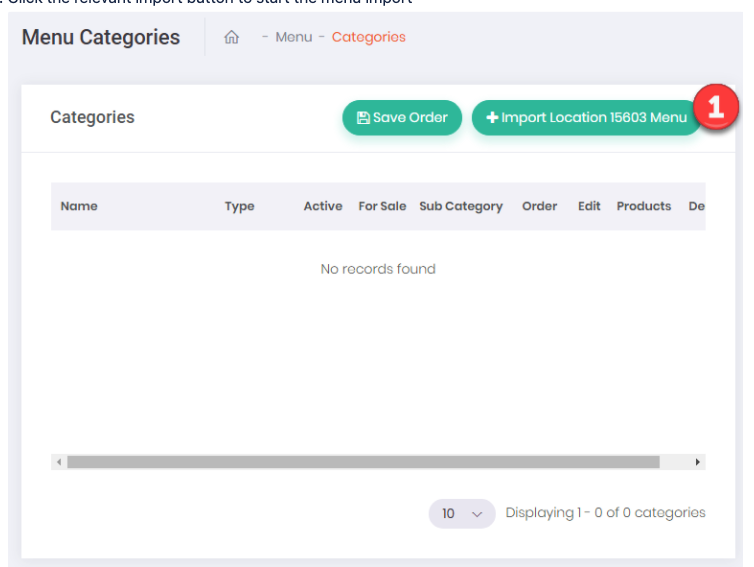
When the ABACUS integration is active, if you go to Menu > Menu Categories you will see an option to Import a menu. In the case of a single store or selected the button will reflect the specific store id, if there are multiple stores there will be a pop up to select which stores you want to import the menu of.
-
Click the relevant import button to start the menu import
-
You will need to confirm this selection to proceed


-
Once complete you will see a success message


-
If you now refresh the categories page you should see the menu categories that have imported from ABACUS. Next step is to verify the menu data that has imported
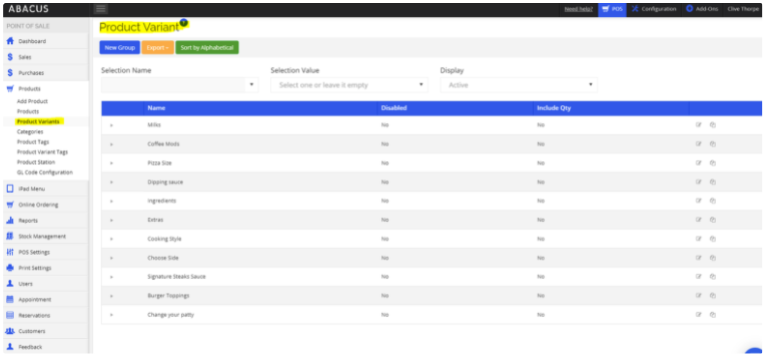
Verifying Menu Attribute Groups
All the attributes are named as variants in ABACUS Dashboard

Sizes
Every category within ABACUS that is imported to Order Up will have a size category created with a default size of Regular created in each. In the case of a product in ABACUS that uses variants each variant will be also created as a size of the relative category so they are assignable to the product. All attribute groups will be saved with
-
Size
appended to the name of the category
Other

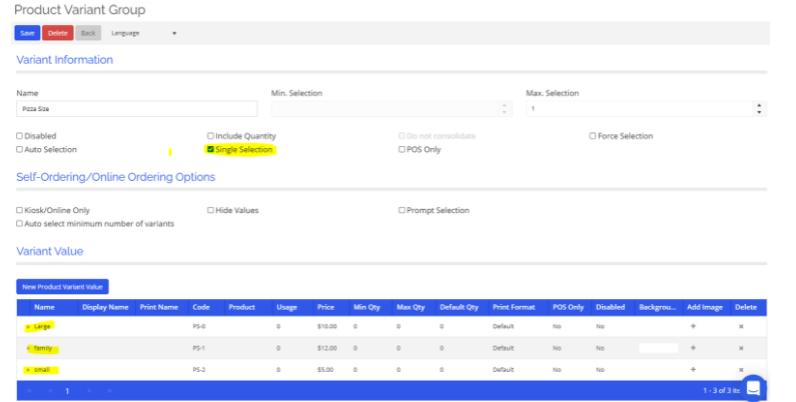

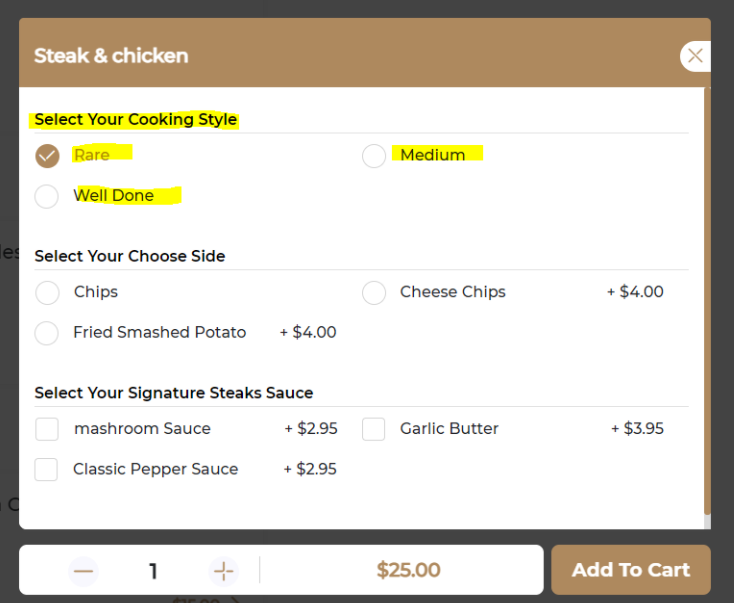
We are setting other has cooking style.

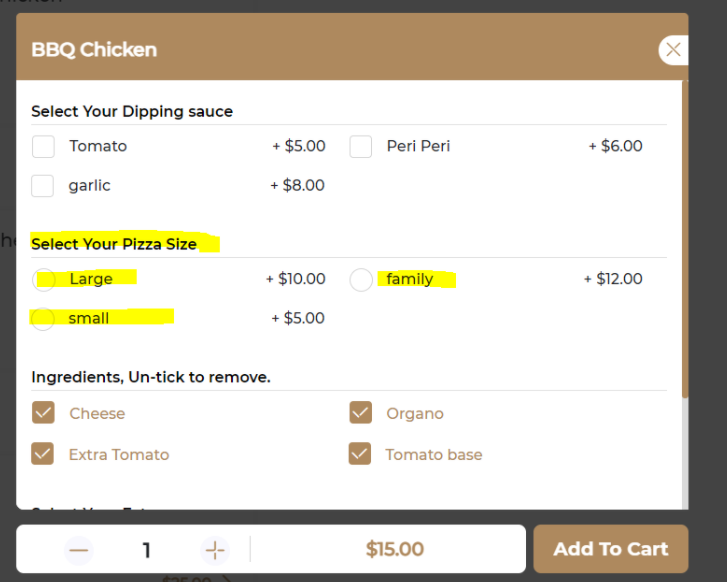
Variant Group with the above selection made, will be considered as Other, It can be used to define Sizes or Extras. Here in the above example we have used it as a Pizza Size.
Condiment

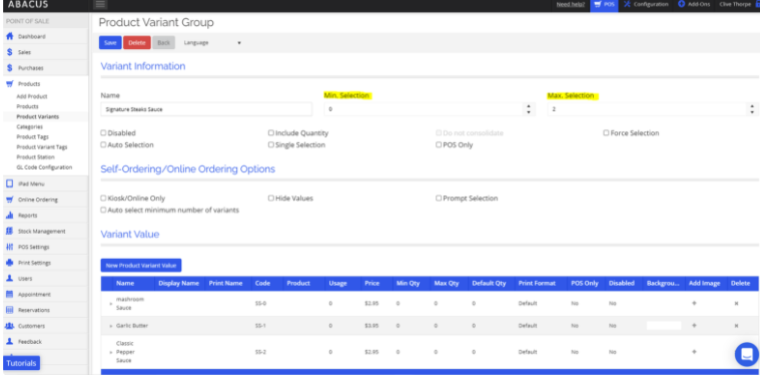


Any Variant with the above Selection will be considered as Condiment.
Topping


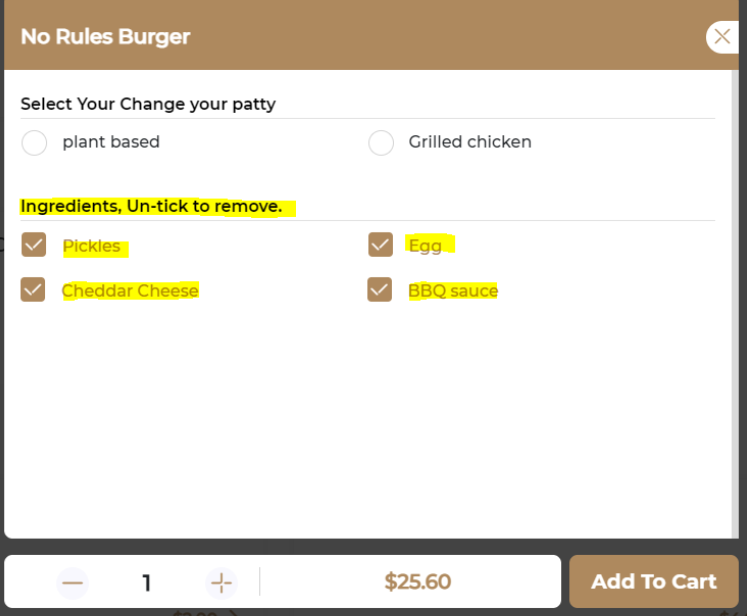

Any Variant with above selection will be considered as topping.
Category


Please refer to the above screen to add a category to the online menu.
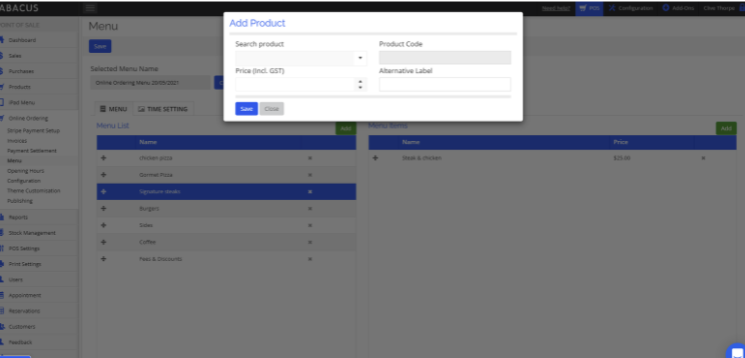
Product
Adding a product please follow the below 2 screens.


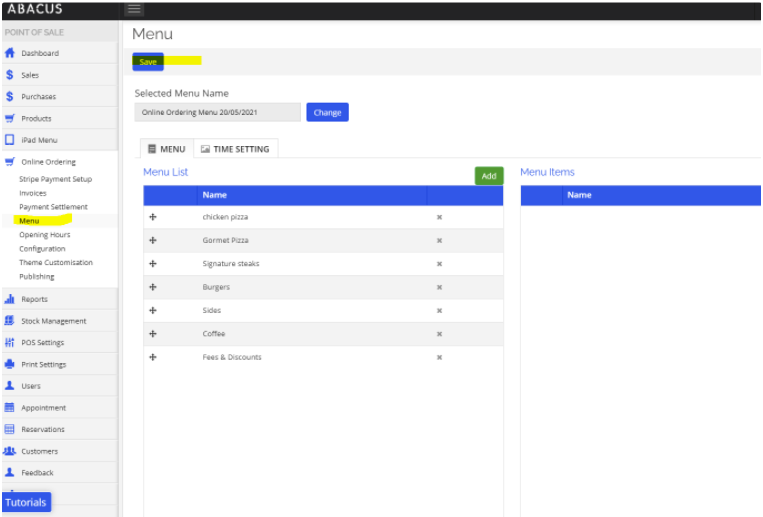
Once the product is added, with all the details required, please go to the online menu section, click the category, products need to be under, a prompt box will open, when you click on 'Add' under Menu Items (Right section), Search for the product, recently added, and click Save, this will be added to online menu.

After making all the changes, As mentioned in the below screen, save button need to be clicked to reflect the changes online.

Processing a sale with Order Up!
After a customer places a successful order via the Order Up! platform the order will be sent to your ABACUS POS. You will receive a flashing notification and hear a sound that indicates there is an order.
If you click on the flashing ‘Orders’ message it will take you to any pending orders.
Accept / Reject
The order will be marked as completed in Order Up and send the customer an email to also confirm.